I have a photo of my grandfather from the 1970s. It is small. It is blurry. For years I assumed restoring it meant either spending money on a professional or uploading it to some AI service I had never heard of.
Then I built something that proved both of those assumptions wrong.
AI image upscaling that runs entirely in your browser is not just possible — it is genuinely impressive. And it means you do not have to hand your private photos to anyone.
Why I Would Not Upload Private Photos to an AI Enhancer
Before I explain how the tool works, I want to explain what you are agreeing to when you use cloud-based AI upscalers.
Let’s Enhance stores your images for 30 days by default. Their AI processes your photos on their cloud GPUs. If you are upscaling something private — an old family photo, a medical image, a confidential document scan — it sits on their servers for a month.
Topaz Photo AI requires an internet connection to validate the software licence. When it checks in, metadata about your processing session is transmitted to their servers.
Adobe Super Resolution — part of Lightroom — routes images through Adobe’s cloud infrastructure for the AI enhancement step. Every image you enhance is processed by Adobe’s servers.
Remini — the popular mobile app — uploads your photos to their servers, processes them with AI, and retains them according to their privacy policy. In 2023, their terms of service raised concerns about rights to processed images.
These tools are excellent for many use cases. But for private, personal, or sensitive images, I want the AI to run on my device, not theirs.
How AI Upscaling Works (The Simple Version)
Traditional image enlargement — the kind that happens when you drag a corner in Photoshop — simply stretches pixels. The result looks blurry because the software is inventing colour values it does not have information about.
AI upscaling works differently. The model I use — Real-ESRGAN — was trained on millions of image pairs: low-resolution originals and their high-resolution counterparts.
Through this training it learned to predict what detail a larger version of any given image should contain. When you upscale a photo with it, it is not stretching pixels — it is intelligently filling in detail based on patterns it has learned.
The result is genuinely different from traditional upscaling. Edges are sharper. Textures look real rather than smeared. Faces have actual detail rather than a blurred approximation of features.
The key question is: does the AI need to run on a powerful cloud server to do this? The answer is no. Modern browsers can run neural networks using WebGL — the same technology that powers browser-based 3D graphics.
Your device’s GPU (even the integrated graphics on a laptop) is capable of running the ESRGAN model. It takes longer than a cloud GPU, but the result is the same and your image never leaves your device.
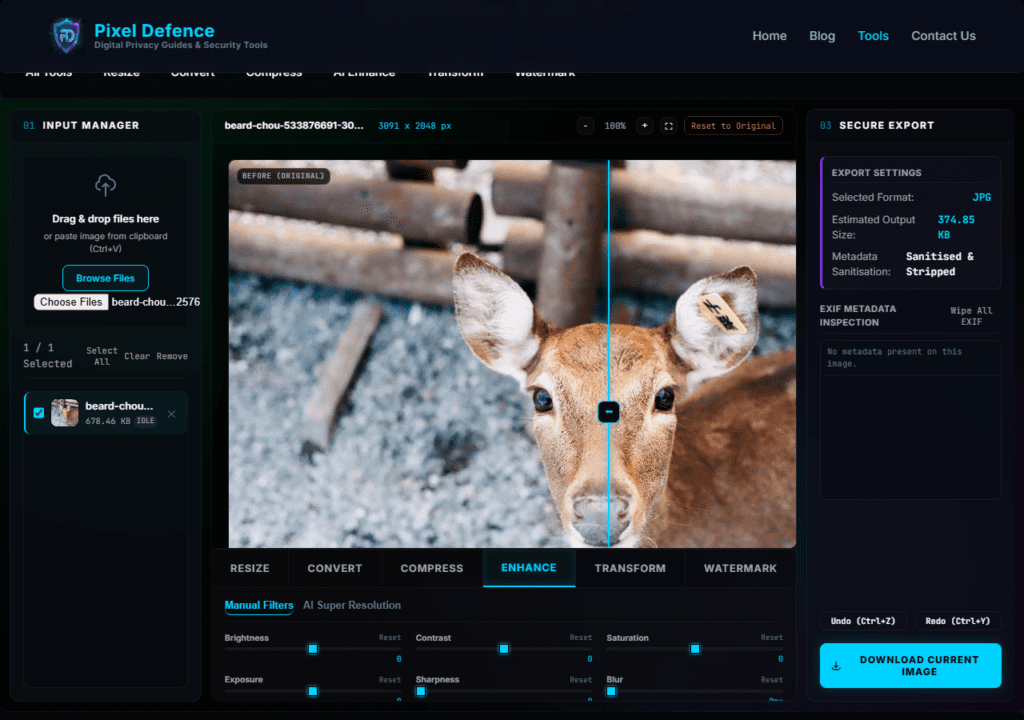
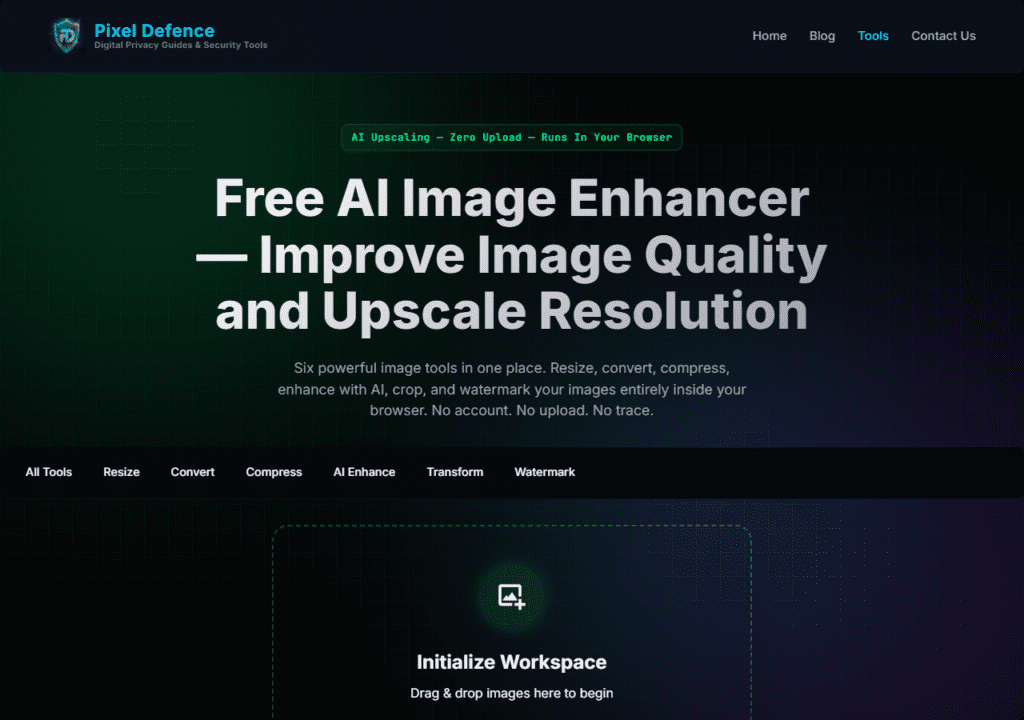
What the Pixel Defence AI Image Enhancer Does
The Free AI Image Enhancer runs the Real-ESRGAN model in your browser using WebGL. Here is what it offers:
- 2x upscaling — doubles the width and height (4× pixel count)
- 4x upscaling — quadruples the width and height (16× pixel count)
- Sharpening controls — post-upscale sharpening to enhance edge definition
- Denoise controls — reduce grain and noise before upscaling
- Before/after comparison slider — see exactly what the AI added
- Supports JPG, PNG, WebP
- Full loading overlay — the page shows a processing screen while the AI runs, so you know it is working and cannot accidentally navigate away
- Images never uploaded — the model runs on your GPU via WebGL
How to Upscale an Image with AI — Step by Step
Step 1: Open the Tool
Go to pixeldefence.com/ai-image-enhancer . No account, no subscription, no credit card. The AI model loads in the background when the page opens — this takes a few seconds depending on your connection, but it only happens once per session.
Step 2: Load Your Image
Drag your image into the workspace or click Browse Files. The tool shows your original image immediately with its dimensions and file size.
Note on image size: The AI works best on images that are already somewhat recognisable — not purely abstract noise. If you have a very small thumbnail (under 100×100 pixels), the AI can still work but the results will be more speculative.
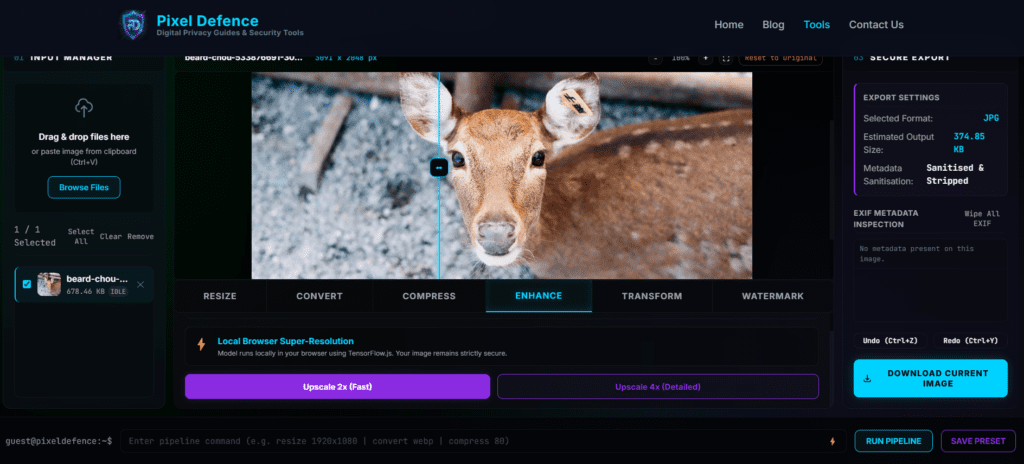
Step 3: Choose Your Upscale Factor
Select 2x or 4x in the enhancement controls panel.
– 2x is faster and appropriate for images that just need a modest size increase — for example, a 800×600 photo you want at 1600×1200
– 4x produces the most dramatic improvement but takes longer to process and produces a very large output file — a 800×600 photo becomes 3200×2400
For most use cases, I recommend 2x as the starting point. You can always run 2x twice if you need a larger result.
Step 4: Click Enhance
Click the Enhance Image button. A full-screen loading overlay appears immediately. This is intentional and important.
The AI enhancement takes 30 to 90 seconds depending on:
- The size of the input image (larger = slower)
- Your device’s GPU capability
- Your browser’s WebGL performance
Do not close the tab or navigate away during processing. The loading screen is there to make it clear the tool is working. When it finishes, the overlay disappears and your enhanced image is shown in the workspace.
Step 5: Compare and Download
Use the before/after split slider to compare the original and enhanced versions. Drag it across the image to see what the AI added. In most cases you will see:
- Sharper edges and defined lines
- Recovered texture in surfaces like fabric, stone, and hair
- Clearer facial features if the image contains faces
- Reduced blurring and jagged artefacts from the original low-resolution source
Click Download Current Image to save your enhanced file.
What Results Should You Expect?
AI upscaling is not magic. Here is an honest breakdown of what it does well and where it has limits:
Works exceptionally well for:
- Old photographs that are small and slightly blurry
- Photos taken in low light that have noise and reduced detail
- Scanned documents or images that lost quality in compression
- Product photos that need to be larger for print
- Screenshots that need to be sharper for presentations
Works reasonably well for:
- Moderately blurry photos taken in good conditions
- Images that were compressed too aggressively and lost detail
Does not work well for:
- Extremely damaged or corrupted images
- Images that are almost entirely featureless (solid colour areas)
- Very large images that push the browser’s memory limits
The technology has improved dramatically in the past two years. Real-ESRGAN, the model this tool uses, was published by researchers at Tencent ARC and has become the standard for practical AI upscaling.
Pro Tips
Resize before upscaling if needed
If your image is enormous and you just want a moderately larger version, use the Free Image Resizer to bring it to the right size first. This also speeds up the AI processing significantly.
Compress after upscaling
AI upscaling produces large files. Use the Free Image Compressor to bring the output down to a manageable size while preserving the enhanced quality.
Run 2x twice for 4x results
If 4x feels too slow on your device, run 2x once, download the result, load it back in, and run 2x again. Two passes of 2x gives roughly equivalent results to one pass of 4x
Frequently Asked Questions
How long does AI enhancement take?
Between 30 and 90 seconds for most images, depending on the image size and your device’s GPU. Very large images may take longer. A loading overlay shows you the tool is working — do not close the tab during processing.
Does AI upscaling actually work?
Yes, and significantly better than traditional upscaling. The Real-ESRGAN model adds genuine detail by predicting what a higher-resolution version of your image should look like, based on patterns learned from millions of image pairs.
What is the difference between 2x and 4x upscaling?
2x doubles the image dimensions (width and height), producing 4× the pixel count. 4x quadruples the dimensions, producing 16× the pixel count. 4x takes longer but produces more dramatic results for very small source images.
Can I enhance a very small image?
Yes, though results become more speculative the smaller the source image. Images under 200×200 pixels will still be processed, but the AI has less information to work from. Results are most impressive for images in the 400×400 to 2000×2000 range.
Will it work on my phone?
Yes, though it will be slower. The AI runs via WebGL on whatever GPU is available. Mobile GPUs are less powerful than desktop ones, so expect processing times at the longer end of the range.
Is my image safe?
Completely. The AI model runs in your browser using WebGL — the same technology that powers browser-based games and 3D graphics. Your image is never transmitted over the internet. The model itself downloads once when the page loads, then runs locally on your device.
Other Tools for Your Image Workflow
- [Free Image Resizer] — resize the enhanced image to your exact target dimensions
- [Free Image Compressor] — reduce the file size of your upscaled output
- [Free Image Converter]— convert your enhanced image to WebP for web use
- [Free Image Transform Tool] — crop the enhanced image to the exact framing you want
- [Free Watermark Maker]— protect restored photos with a watermark before sharing
Upscale Images with AI: Quick Action Checklist
- Open pixeldefence.com/ai-image-enhancer — AI model loads automatically
- Drop your image into the workspace
- Select 2x upscaling (recommended starting point) or 4x for maximum enlargement
- Click Enhance — the loading overlay appears while the AI processes
- Wait 30–90 seconds — do not close the tab
- Use the before/after slider to compare original and enhanced
- Download your enhanced image
- Compress and convert to WebP if using for web
Your images. Your device. Your GPU doing the work. That is how AI image enhancement should work.
Try the Free AI Image Enhancer now.