My phone saved a portrait shot sideways. Portrait. Shot. Sideways. I needed to rotate it 90 degrees and crop a sliver of blank sky off the top — a ten-second job at most.
My first instinct was to open Canva. I had a tab already pinned. I dragged the photo in, made the fix, downloaded the file — and then it hit me.
I had just uploaded a personal photo to Canva’s servers without thinking. For a rotation. That took six clicks and a sign-in. The image was now sitting in Canva’s cloud, covered by their terms of service, stored indefinitely. For a 90-degree rotation.
That moment is why the Free Image Transform Tool at Pixel Defence exists.
I’m going to show you exactly how to crop and rotate images using it — step by step — so you never have to hand your photos to a third-party server for something this simple again.
Why Popular Online Crop and Rotate Tools Are a Privacy Problem
Hear me out before you dismiss this. I know “it’s just a crop” sounds harmless. But here is what actually happens when you use the most popular free online tools.
iLoveIMG and Ezgif — two of the most-used free image tools on the internet — work by uploading your image to their servers for processing.
The file leaves your machine, hits their infrastructure, gets transformed, and then you download the result. Their “temporary” storage policies sound reassuring, but ask yourself: why does a rotation need a server at all?
Rotating an image is a mathematical operation that any modern browser can perform locally, in milliseconds, using nothing but JavaScript and the HTML Canvas API . There is zero technical reason your image needs to travel anywhere.
Canva is a bigger concern. Canva requires an account — which means your email address, your login history, and your images are all associated.
Their terms of service include a licence clause: by uploading content, you grant Canva a broad right to use it for service operation and improvement. That’s standard boilerplate, and most people never read it.
But it means your client’s product photos, the medical scan you needed to crop, your child’s school photo — they’re all in Canva’s cloud, covered by a licence you probably glossed over, stored indefinitely.
The stakes go up depending on what you’re cropping. ID documents, legal paperwork, medical photos, intimate family shots — these things should never touch an external server for convenience.
If you want to understand exactly what data your files could be leaking, the Data Leaking Check tool can help you see it. But the first line of defence is simple: don’t upload what you don’t have to upload.
The Free Image Transform Tool processes everything in your browser. No upload. No server. No account. The image never leaves your machine. That’s not a promise — it’s how the technology works.
What the Free Image Transform Tool Does
Before I walk you through each operation, here’s a plain-English summary of what the tool covers:
| Feature | What it does |
|—|—|
| Crop | Drag handles or type exact pixels / aspect ratio |
| Rotate | 90° left, 90° right, or any custom angle |
| Flip | Horizontal mirror or vertical flip, one click each |
| Before/After Slider | Compare original vs. transformed before downloading |
| Quality | No re-compression by default — original quality preserved |
| Batch Mode | Process multiple images in a single session |
| EXIF Stripped | GPS, device model, timestamp removed on export |
| Account required | None |
| Upload to server | Never |
How to Crop and Rotate Images — Step by Step
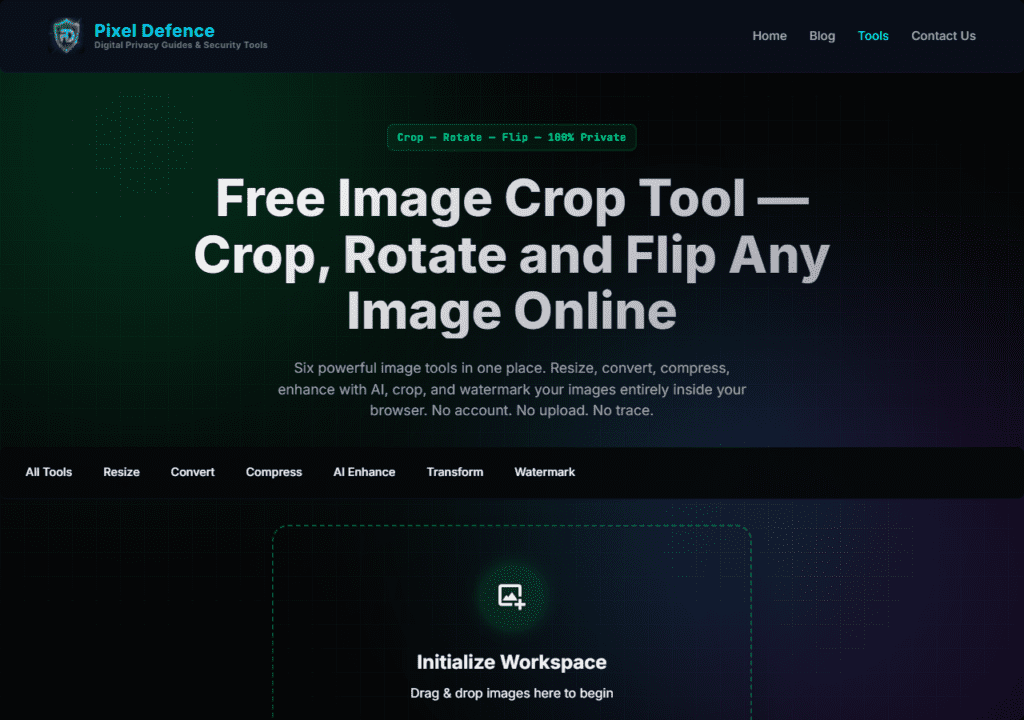
Step 1: Open the Free Image Transform Tool
Go to pixeldefence.com/image-transform/. No login prompt. No pop-up asking for your email address. The workspace loads immediately — a large drag-and-drop zone sits front and centre.
Step 2: Drop Your Image In
Drag your image from your desktop or file explorer directly onto the drop zone, or click the zone to open a file picker. The tool accepts JPG, PNG, WEBP, and most common image formats.
The image loads instantly. Notice the pixel dimensions shown alongside it — this example is a 3213 × 5712px portrait shot straight from a phone camera.
The control panel appears immediately. There is no loading spinner, no “uploading…” indicator, because nothing is uploading. The image moved from your file system into browser memory. Full stop.
Step 3a: Crop — Drag Handles or Type Exact Dimensions
Click the Crop tab in the control panel. Two approaches:
Freehand with handles: Corner and edge handles appear around your image. Drag any handle to define the crop area. The region you keep is highlighted; everything outside dims. Good for composition crops where you’re eyeballing the frame.
Exact dimensions or ratio: Type a pixel width and height (e.g., 1920 × 1080) or select a preset aspect ratio from the dropdown — options include 1:1, 4:3, 16:9, 9:16, 4:5, and more.
The crop box snaps to your input immediately. This is the fastest way to crop for a specific platform without guessing.
Common platform ratios for reference:
| Platform | Ratio to use |
|—|—|
| Instagram Post | 1:1 or 4:5 |
| Instagram Story / TikTok | 9:16 |
| Facebook Cover | 16:9 |
| YouTube Thumbnail | 16:9 |
| Twitter / X Header | 3:1 |
| LinkedIn Post | 1.91:1 |
Once your crop area looks right, click Apply Crop.
>Need to resize after cropping? The Free Image Resizer lets you hit exact pixel targets with aspect ratio lock — a natural next step after cropping.
Step 3b: Rotate — 90° Quick Buttons or Custom Angle
Click the Rotate tab. Three options appear:
90° Left / 90° Right buttons: One click, instant rotation. This is the fix for a phone photo that saved in the wrong orientation. Click once — done. Click again if you need to keep going.
Custom angle input: Type any degree value — including decimals. Positive values rotate clockwise; negative values rotate counter-clockwise.
For horizon correction, you’ll almost always be working in the –5° to +5° range. A photo where the horizon tilts slightly left might need –2° or –3°. Start small and use the before/after slider to judge.
Drag the divider left or right across the image to compare the original against the rotated version in real time. This is the clearest way to judge whether your custom angle is right before locking it in.
Step 3c: Flip — Horizontal or Vertical, One Click Each
Click the Flip tab. Two buttons:
Flip Horizontal: Mirrors the image left-to-right. Use this for product shots where the subject faces the wrong way, for correcting selfies, or for mirroring graphics.
Flip Vertical: Flips the image upside down. Less common in day-to-day use, but useful for water-reflection composites or fixing certain scan orientations.
Flip operations stack cleanly on top of any crop or rotation already applied. You can crop to 1:1, rotate 90° right, then flip horizontal — and the tool handles the sequence correctly.
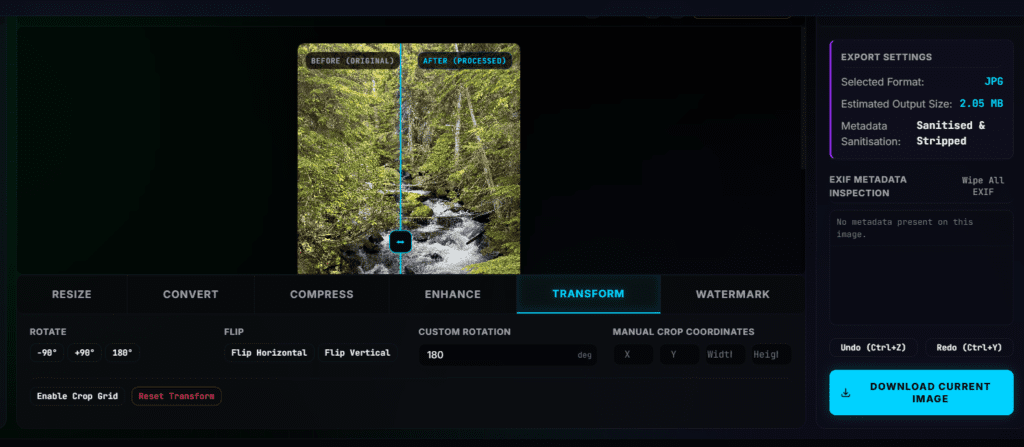
Step 4: Preview with the Before/After Comparison Slider
Before downloading, use the split-screen slider. Drag the divider handle across your image to see original versus transformed side by side — labelled BEFORE and AFTER in the interface. Check horizon lines, subject framing, and whether your crop caught everything you wanted.
Every operation is non-destructive until you download. Your original sits untouched in browser memory. Adjust freely.
Step 5: Download Your Image
Click Download. The file saves directly to your Downloads folder. EXIF metadata — GPS coordinates, camera model, timestamp — is automatically stripped from the exported file.
If you need to remove EXIF from files you’re not transforming, the Metadata Scrubber is the dedicated tool for that.
If this image is going on a website, consider passing it through the Free Image Compressor next to cut file size for faster page loads. Or run it through the Free Image Converter to convert to WebP for modern browsers.
If you want AI sharpening or upscaling before you publish, the Free AI Image Enhancer handles that next.
Pro Tips and Advanced Use
Straightening a Wonky Horizon
Load the photo, go to Rotate, use the custom angle field. Start with ±1° or ±2° and watch the image adjust in real time. Use the before/after slider to compare against the original. Most tilted horizons need less than 3° of correction. For very subtle fixes, try 0.5° increments — you’ll nail it within two tries.
Batch Transforming a Set of Phone Photos
If you imported a batch of photos that all saved in the wrong orientation — common when shooting in burst mode — load them all into the tool at once. Apply the rotation to the first image in the queue, then work through the rest. Batch mode saves you repeating the same operation file by file.
Combining Transforms for Product Photography
A common workflow:
- Flip horizontal — mirror the product to face right
- Crop to 1:1 — square format for product listings
- Check with the before/after slider
- Download
If the product shot needs a watermark for brand protection, take the cropped file straight into the Free Watermark Maker as your next step.
The Full Private Editing Pipeline
The Full Image Toolkit puts every Pixel Defence tool in one place. A complete post-shoot workflow, all browser-based, all private:
- Transform Tool — crop, rotate, flip
- AI Image Enhancer — sharpen and upscale if needed
- Metadata Scrubber — strip EXIF before sharing
- Image Compressor — reduce file size for web
- Image Converter — convert to WebP for site performance
None of your images leave your machine at any step.
Frequently Asked Questions
Can I crop to an exact pixel size?
Yes. In the Crop tab, type your target width and height directly into the pixel input fields — for example, 1920 × 1080 — and the crop box snaps to those exact dimensions. You can also lock the aspect ratio so that adjusting one value scales the other proportionally.
Will cropping reduce image quality?
No. Cropping removes pixels at the edges — the pixels inside the crop area are completely untouched. The Free Image Transform Tool does not re-compress the image on export unless you choose to. What you crop is what you get, at full original quality.
How do I straighten a wonky photo?
Go to the Rotate tab and use the custom angle input. Type a small positive or negative value — start with ±1° or ±2° — and watch the image rotate in real time. Use the before/after slider to compare. Adjust until the horizon looks level. Most tilted photos need less than 3° of correction.
Can I rotate multiple images at once?
Yes. Load multiple files into the tool in one session using batch mode. Apply your rotation or flip to each image in the queue. This is especially useful for a batch of phone photos that all came out in the wrong orientation from a single shoot.
What aspect ratios can I crop to?
The tool includes presets for the most common ratios: 1:1, 4:3, 3:4, 16:9, 9:16, 4:5, 5:4, 3:2, and 2:3. You can also enter any custom ratio or exact pixel dimensions for formats not in the preset list.
does it work with portrait photos from my phone?
Perfectly. Modern phone cameras produce large portrait files — 3000 × 5000px and above. The tool handles them without slowing down, because all processing happens on your device using your CPU and GPU, not a remote server. The waterfall image in the screenshots above is 3213 × 5712px and loaded instantly.
All Pixel Defence Tools — All Private, All Browser-Based
- Free Image Resizer — Change pixel dimensions without quality loss
- Free Image Converter — Convert between JPG, PNG, WebP, AVIF, and more
- Free Image Compressor — Reduce file size for web and email
- Free AI Image Enhancer — AI upscaling and sharpening, client-side
- Free Image Transform Tool — Crop, rotate, and flip (this tool)
- Free Watermark Maker — Add text or logo watermarks
- Full Toolkit — Every tool in one place
Your Action Checklist
Use this next time you’re about to reach for Canva or iLoveIMG:
- [ ] Open pixeldefence.com/image-transform/ — zero sign-in
- [ ] Drop your image into the workspace
- [ ] Crop: drag handles or type exact pixels / ratio in the Crop tab
- [ ] Rotate: click 90° buttons or type a custom angle for horizon straightening
- [ ] Flip: click horizontal or vertical flip if needed
- [ ] Use the before/after comparison slider to confirm the result
- [ ] Click Download — EXIF stripped, quality preserved
- [ ] Pass through the [Free Image Compressor or Free Image Converter if you’re publishing to the web
- [ ] Bookmark the Full Toolkit for instant access next time