I once watched someone spend twenty minutes uploading photos to TinyPNG, waiting for compression, downloading, re-uploading because the size was still too large — for a blog post.
Twenty minutes of their time, and every one of those photos now lives on a server they have no control over.
I do not think most people realise that TinyPNG is a cloud service. You are uploading your images to their servers. They process them. They send them back. The images sit there.
There is a better way. And it is faster.
The Problem With Cloud Image Compressors
Every free image compressor that asks you to upload a file is running your image through their server. Here is the breakdown of the most popular ones:
TinyPNG / TinyJPG — one of the most widely used. Uploads your file to their cloud infrastructure. Their privacy policy states they may retain images for “a reasonable time” to provide their service.
Squoosh by Google — Google’s own image compression tool. Even though it presents itself as a browser tool, certain functions route through Google’s infrastructure. If you are not comfortable with Google having access to your images, this matters.
Compressor.io — straightforward cloud upload model. Files go to their servers, compressed, sent back. No detail in their policy about retention periods.
Adobe Express Image Resizer — requires an Adobe account. Your images are tied to their cloud ecosystem.
The alternative is compression that runs entirely in the browser, using your device’s own processing power. No upload, no wait for a server response, no images on someone else’s infrastructure.
What the Pixel Defence Image Compressor Does
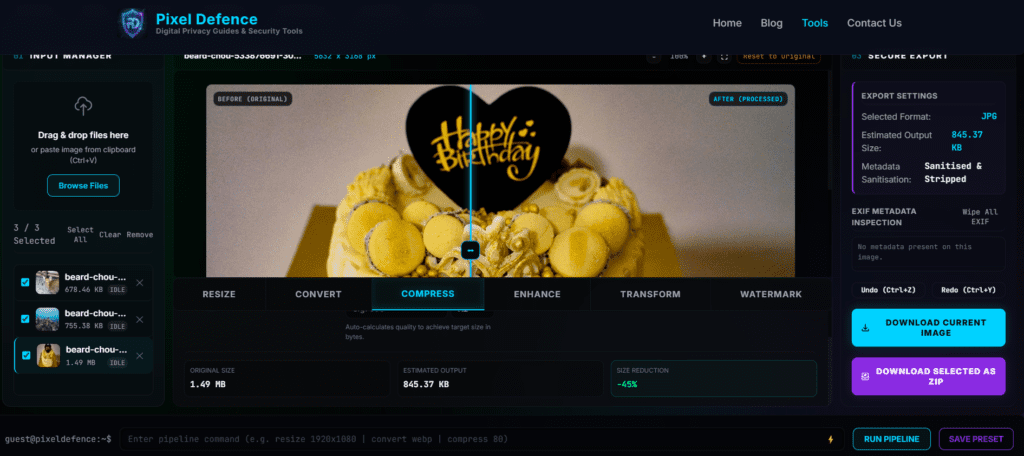
The Free Image Compressor compresses JPG, PNG, WebP, and AVIF images entirely in your browser. The Canvas API re-encodes the image at your chosen quality level. The original never leaves your device.
What makes this compressor more useful than most is the target file size feature. Instead of guessing what quality slider value gives you a 200KB output, you type “200” and the tool works backwards to find the right quality. This is invaluable for upload forms with strict file size limits.
Here are the key features:
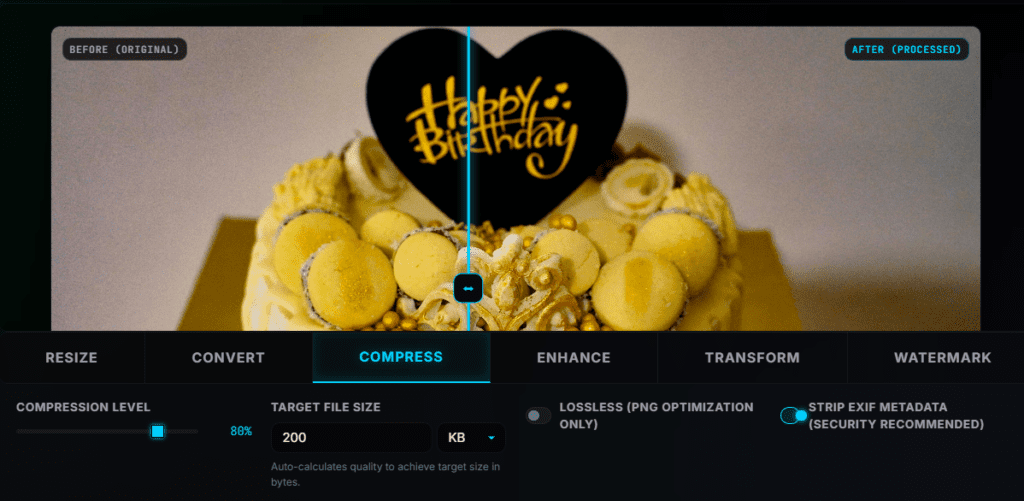
- Quality slider — drag from 1 to 100. The estimated output size updates in real time
- Target file size — type your maximum file size in KB and the tool optimises to that
- Batch compression — drop multiple images, compress all at once, download as ZIP
- EXIF metadata stripped — GPS, camera data, timestamps removed on every output
- Before/after comparison slider — visually check quality before downloading
- Supports JPG, PNG, WebP, AVIF — all the major formats
How to Compress Images — Step by Step
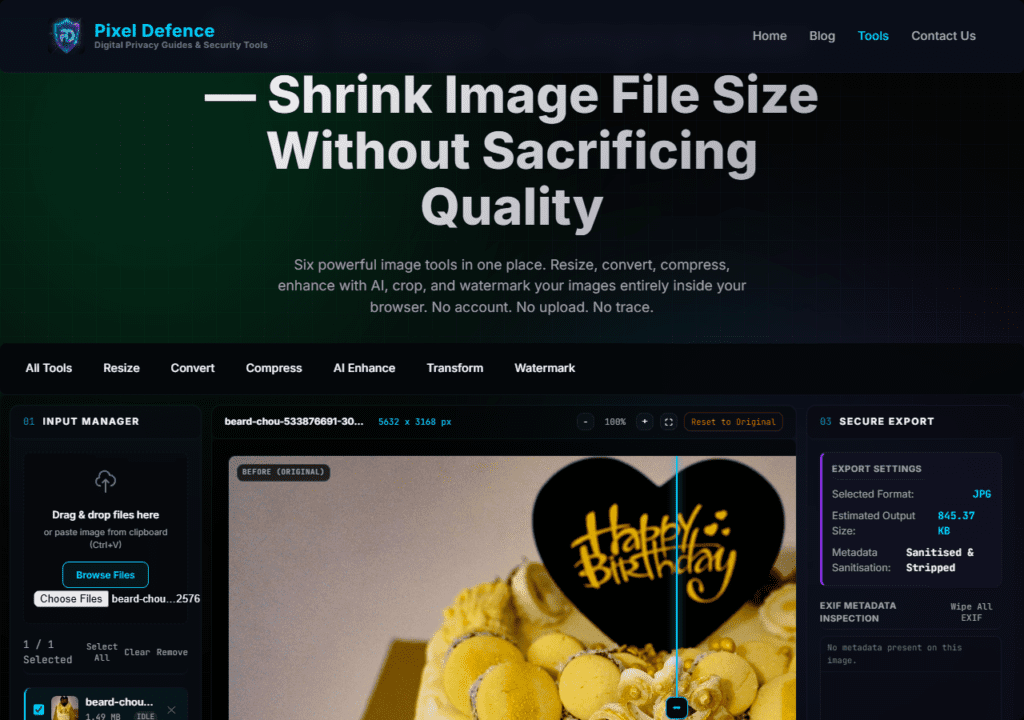
Step 1: Open the Compressor
Go to pixeldefence.com/image-compressor. Nothing to install, no account, no email address required.
Step 2: Load Your Image
Drag your image into the workspace or click Browse Files. You can load multiple images at once for batch compression. The tool immediately shows you the original file dimensions, file size, and a preview in the central workspace.
Step 3: Choose Your Compression Method
You have two options:
Method A — Quality slider:
Drag the slider left to reduce quality (and file size) or right to preserve quality. Watch the Estimated Output Size update in the export panel as you move the slider. Most images look sharp at 75–85%. Below 60% you start to see noticeable degradation in photographs.
Method B — Target file size:
If you know you need the image under a specific size — say, an email attachment limit of 500KB or a form that rejects anything above 200KB — type the number directly in the target size field. The tool calculates the best quality setting to hit that target.
Step 4: Check the Before/After Preview
Use the split slider in the central workspace to compare the original against the compressed version. Drag it left to see more of the compressed output, right to see more of the original. For photographs, a quality setting of 75–80% is usually invisible at normal viewing sizes.
Step 5: Download
For a single image, click Download Current Image. For multiple images, select them all in the file list and click Download Selected as ZIP. The compression and encoding happens at download time, entirely in your browser.
What Quality Setting Should You Use?
This is the most common question, and the honest answer is: it depends on the image and the use case.
For website images:
I use 75–80% quality. This is the sweet spot where JPG compression artefacts are not visible at normal screen sizes, but file sizes are typically 50–70% smaller than the original. Google’s own performance documentation recommends keeping images under 200KB for fast load times.
For email attachments:
70–75% is usually sufficient. Email clients display images at relatively low effective resolutions, so compression is rarely visible.
For social media:
80–85%. Social platforms re-compress your images anyway when you upload them. Starting with a slightly compressed version reduces the double-compression damage.
For print:
Do not compress. Keep at 100% quality or export as PNG for print-quality work.
For profile photos and thumbnails:
These are displayed at small sizes. You can compress aggressively to 60–70% without any visible quality loss.
The Website Performance Case for Image Compression
Images are consistently the single largest contributor to slow web page load times. According to WebPageTest analysis of the top 1 million websites, images account for over 50% of total page weight on average.
Google’s Core Web Vitals — which directly affect search rankings — are significantly impacted by large, unoptimised images.
If you run a website and you have never compressed your images, doing so is likely the highest-return performance improvement you can make.
A page that loads in 1.5 seconds instead of 4 seconds converts better, ranks better, and costs less bandwidth.
The practical workflow I use: compress every image to under 150KB using this tool, then convert to WebP using the Free Image Converter. WebP at 80% quality is typically 40–50% smaller than JPG at the same visual quality.
Pro Tips
Use batch mode for existing websites
If you have hundreds of existing images on your site that were never compressed, you can process them all at once. Drop a folder’s worth of images in, set quality to 78%, download the ZIP, replace your originals.
Check the estimated size before downloading
The export panel shows a live estimate. Use this to dial in the exact quality you need rather than guessing.
Chain with the converter
After compressing, you can convert to WebP for an additional size reduction. The Full Image Toolkit lets you do this in a single pipeline command: `compress 80 | convert webp`.
Preserve PNG transparency
Compressing a PNG keeps the transparent background intact. The output will still be PNG with full alpha channel — just at a smaller file size.
Frequently Asked Questions
How much can I compress an image without losing quality?
For most photographs, a quality setting of 75–80% is visually identical to the original at normal viewing sizes while reducing file size by 50–70%. Below 60% you may start to see compression artefacts, particularly in areas of flat colour or fine detail.
What is the best quality setting for websites?
I recommend 75–80% for website images. This balances visual quality with fast load times. For hero images or large featured images where quality is critical, use 85%.
Can I compress PNG without losing transparency?
Yes. PNG compression in this tool preserves the alpha channel (transparent background). Your output PNG will maintain full transparency.
Is there a file size or image count limit?
No server-side limits apply because all compression runs in your browser. Very large images (over 50 megapixels) may be slow depending on your device, but there is no imposed limit.
What is the difference between lossy and lossless compression?
Lossy compression (used for JPG and WebP) discards some image data to achieve smaller files. The visual impact depends on the compression level. Lossless compression (used for PNG) reduces file size without discarding any data. The compressor applies the appropriate method for each format.
Can I compress a batch of images at once?
Yes. Load multiple images, set your quality level once, and download all as a ZIP file. The same quality setting applies to every image in the batch.
Other Tools for Your Workflow
After compressing, you might also need to:
- [Free Image Converter] — convert your compressed JPGs to WebP for additional size reduction
- [Free Image Resizer] — reduce dimensions before compressing (smaller pixels = smaller file)
- [Free AI Image Enhancer] — upscale a small image to larger dimensions before compression
- [Free Image Transform Tool] — crop unnecessary parts of an image (fewer pixels = easier to compress)
- [Free Watermark Maker] — protect compressed images with a watermark before publishing
Compress Images: Quick Action Checklist
- Open pixeldefence.com/image-compressor— no account, no upload
- Drop your image(s) into the workspace
- Choose method: quality slider (75–80% for most uses) or target file size (type the KB limit)
- Check the estimated output size in the export panel
- Use the before/after split slider to visually verify quality
- Download: single file or ZIP for batch jobs
- All output files have EXIF metadata stripped automatically
Compressing an image should take you 20 seconds, not 20 minutes. And your files should stay on your device, not sit on a server you have never heard of.
That is what the Free Image Compressor is built for.