Stop Jumping Between 5 Different Websites — All the Free Image Editing Tools You Need Are Right Here
Last month I counted how many browser tabs I had open just to prepare a single photo for a blog post. Five tabs across 3 different websites, each one asking me to create an account, each one sitting on the other side of the internet holding my images on its servers.
That’s the moment I decided to build something different. If you’re looking for free image editing tools online that don’t treat your images like a cloud asset to be harvested, the Full Image Toolkit is what I built for you — six professional-grade tools, all running directly in your browser, all completely private.
The Fragmentation Problem Costing You Time Every Week
Here is what a typical image editing session looks like for most people I’ve spoken to — bloggers, social media managers, small business owners, photographers.
They take a photo. They need to resize it for a website thumbnail. First tool. Then compress it because the file is too large for their page load budget.
Second tool. Then convert it to WebP because Google’s Core Web Vitals now penalise slow-loading JPEGs. Third tool. Then a watermark before posting to Instagram. Fourth tool.
By the end, they’ve uploaded their image to 3 separate servers — 3 different companies’ infrastructure — and sat through 3 separate processing spinners, 3 download prompts, and possibly 3 email sign-up nags.
This is the fragmentation problem. It’s invisible, it’s time-expensive, and most people accept it as just how image editing works online.
It doesn’t have to be.
The Privacy Risk of Using Multiple Cloud Image Tools
This is the part that alarmed me when I researched it properly.
TinyPNG — a tool millions of people use every day — stores uploaded images on its servers. Files are deleted within a “reasonable time,” but that phrase is doing a lot of legal work without giving you any actual guarantees.
Convertio is more transparent but not more reassuring: it keeps your files for 24 hours after conversion.
That means client product photos, personal family pictures, brand assets — sitting on a third-party server in a location you don’t control, for a full day after you’ve finished using the tool.
Canva’s Terms of Service grant them a licence to use your uploaded content in connection with their services. Read that twice if you’re a photographer or a creative professional who uploads original work.
iLoveIMG and dozens of similar platforms operate on the same model: your image travels to their server, processing happens there, and the file theoretically gets deleted. You have no way to verify any part of that chain.
I’m not accusing any of these companies of acting in bad faith. I’m saying that when you upload images to an unfamiliar server, you are extending a degree of trust that most people don’t consciously choose to extend.
Every tool in the Pixel Defence toolkit processes images entirely inside your browser using your own device’s CPU and GPU, via JavaScript and the browser’s native Canvas API. No image data is ever transmitted to any server. Not mine, not anyone else’s.
The 6 Free Image Editing Tools in One Toolkit

Here is what lives on one page, at one URL:
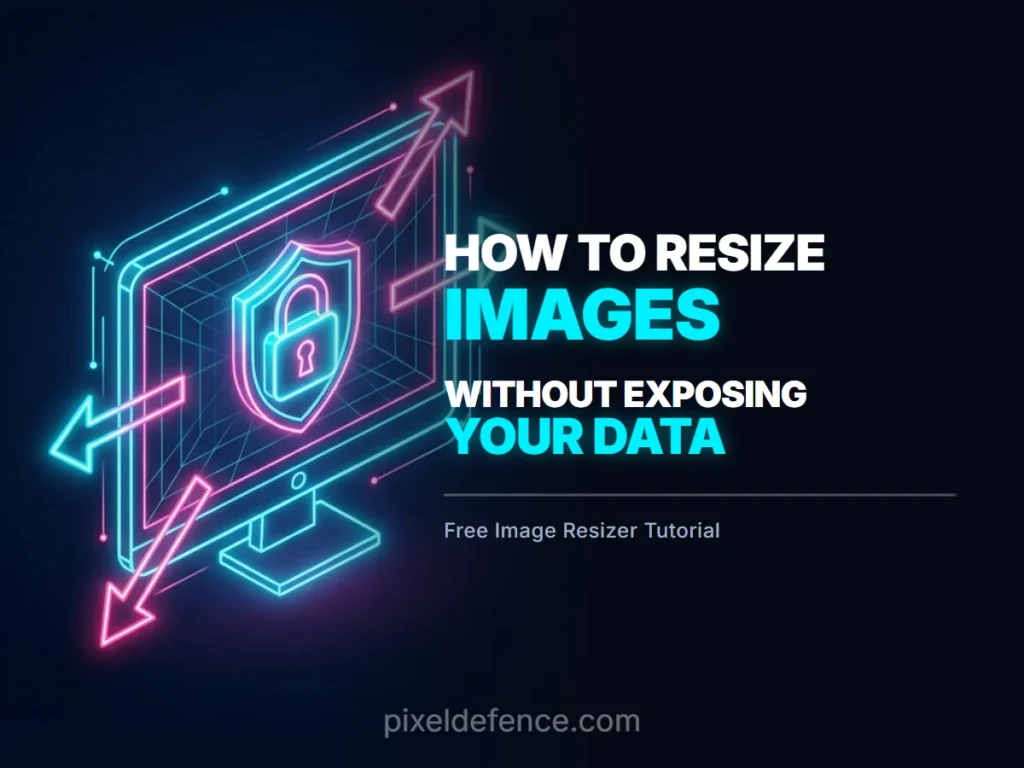
Free Image Resizer
The Free Image Resizer lets you enter exact pixel dimensions or choose from built-in social media presets — Instagram square (1080×1080), Twitter/X banner (1500×500), YouTube thumbnail (1280×720), Facebook cover (820×312), LinkedIn post (1200×627), and more. Aspect ratio lock is toggleable.
Most cameras produce images at 4000×3000 pixels or larger. Serving that on a blog is never necessary and always damaging to page speed.
Free Image Converter
The Free Image Converter converts between JPG, PNG, WebP, AVIF, GIF, BMP, and TIFF — entirely client-side. WebP is now the recommended web image form according to Google, delivering 25–35% smaller file sizes than JPEG at equivalent visual quality. The converter makes that switch a single click.
Free Image Compressor
The Free Image Compressor shows live before-and-after file sizes as you move the quality slider from 0 to 100. At a setting of 80, a typical 2MB camera JPEG drops to roughly 180–220KB — a reduction of nearly 90% with no visible quality difference at screen-viewing sizes.
Free AI Image Enhancer
The Free AI Image Enhancer runs the ESRGAN neural network model directly in the browser using ONNX runtime, upscaling and sharpening low-resolution or blurry images at 2× or 4× without sending a single pixel to a server. This is the tool for scanned photos, old screenshots, or any image that has lost its crispness.
Free Image Transform Tool
The Free Image Transform Tool handles cropping, rotation (90-degree steps or a custom angle), and horizontal/vertical flipping. It also auto-corrects EXIF orientation data — the common problem where photos taken on a phone appear sideways in certain apps or web browsers.
Free Watermark Maker
The Free Watermark Maker adds text or logo watermarks with full control over font, size, colour, opacity, and position. Once a photo is shared publicly, attribution is nearly impossible to enforce without a visible watermark baked into the image file itself.
The Pipeline Command Bar — Chain All Six Operations in One Pass

The feature that transforms this from a convenience into a genuinely powerful workflow tool is the pipeline command bar at the bottom of the interface.
It accepts a simple pipe-separated instruction:
resize 1920x1080 | convert webp | compress 80That single line runs three operations in sequence on your loaded image:
1. Resize to 1920×1080 pixels
2. Convert the output to WebP format
3. Compress the final file to 80% quality
No code knowledge is required. The dropdown next to the command bar lists every available operation — click one and it appends the correct syntax to the bar automatically. Build your pipeline recipe once, and run it on every image that follows.
For anyone who prepares images for a website or content platform on a regular basis, this feature alone eliminates the repetitive portion of the job.
Which Tool Should You Use? A Practical Decision Guide
Not sure which tool to reach for first? Use this table:
| Your situation | Tool to use |
|—|—|
| I need to change image dimensions | [Free Image Resizer] |
| I need to change file format (e.g. PNG to WebP) | [Free Image Converter] |
| My image file size is too large | [Free Image Compressor] |
| My image is blurry or low resolution | [Free AI Image Enhancer] |
| I need to crop or rotate my photo | [Free Image Transform Tool] |
| I want to brand or protect my photo | [Free Watermark Maker] |
For most real-world scenarios — a blog image, an e-commerce product photo, a social media post — you will need at least three of these tools. The Full Image Toolkit puts all of them at your fingertips without a single tab switch.
Step by Step: My Blog Image Workflow (Under 60 Seconds)

Here is my exact workflow for taking a photo from camera roll to published blog image. The image never leaves my device.
Step 1 — Drop the photo into the toolkit

I drag the image straight from my desktop into the Input Manager panel. The file loads across the three-panel workspace instantly: Input Manager on the left, tool controls in the centre, Secure Export on the right. No progress bar, no uploading animation — because there is no upload.
Step 2 — Resize to 1200×675

I click the Resize tool. 1200×675 pixels is the Open Graph standard — the dimensions that determine how a blog post preview appears when shared on Facebook, LinkedIn, Twitter, and iMessage. I enter 1200 × 675 and hit Apply.
Step 3 — Compress to 80% quality

In the Compressor, I pull the slider to 80. The live readout shows my image has gone from roughly 900KB to 200KB. That’s a 90% reduction. At 1200×675 display size, there is no visible quality difference whatsoever.
Step 4 — Convert to WebP

In the Converter, I select WebP. The format re-encodes the already-compressed image, shaving another 15–25% off the file size. My final file is around 165KB — down from 900KB at the start.
Step 5 — Download via Secure Export

I click the Secure Export button. The file downloads directly to my computer. Total elapsed time: 47 seconds. The image has been on exactly one device throughout this entire process: mine.
If I’m doing this for a batch of blog posts in one sitting, I write the pipeline command once — `resize 1200×630 | compress 80 | convert webp` — and run it on each image in sequence.
Pro Tips for Power Users
Try AVIF for the smallest possible files
WebP is my default and has excellent browser support. But if you’re targeting modern browsers and want the absolute minimum file size, AVIF compresses 50% better than JPEG at equivalent visual quality. Use the converter and test it.
Use the AI Enhancer on screenshots
Screenshots from lower-resolution displays often look soft when viewed at full size. Running them through the AI Image Enhancer at 2× produces noticeably sharper text and edge detail — useful for tutorial content and documentation imagery.
Watermark before social, not after
Once an image is posted without a watermark and someone screenshots it, your attribution window is gone. Make the Watermark Maker the last step in your pipeline for anything that will appear on Instagram, Pinterest, or LinkedIn.
Frequently Asked Questions
Is this really free with no account needed?
Yes — every tool in the toolkit is completely free, with no account creation, no email verification, and no personal information required. Open the toolkit, drop your image in, edit it, download it. Nothing more is asked of you.
What image formats does the toolkit support?
The toolkit accepts JPG/JPEG, PNG, WebP, AVIF, GIF, BMP, and TIFF as input. The converter can export to JPG, PNG, WebP, and AVIF. All other tools — resizer, compressor, transform, enhancer, watermark — preserve the original format by default.
Can I use the pipeline command bar without knowing code?
Absolutely. The command bar has a dropdown picker that lists every available operation. Click one, and it appends the correct syntax automatically. The only “technical” element is the pipe character (`|`), which simply means “then do this next.” No coding ability is needed.
Does the toolkit work on mobile?
Yes. The toolkit is fully responsive and functions in Chrome for Android and Safari on iOS. The one exception to watch is the AI Image Enhancer — it runs a neural network in the browser, which is computationally demanding. On lower-powered mobile devices it may be slow. All other tools are fast on mobile hardware.
Is there a limit on how many images I can process?
There is no server-side limit, because there is no server. The only practical constraint is your own device’s RAM and processing speed. Images under 20–30MB process without issues on any reasonably modern device.
How is this different from Photoshop or Canva?
Photoshop is a powerful desktop application that costs £20–£54/month via Adobe Creative Cloud. Most people using it for blog and social media prep pay for professional capabilities they never use.
Canva is browser-based but cloud-dependent — your images are stored on their servers, the free tier is deliberately limited to drive Canva Pro upgrades, and their ToS includes content licencing clauses.
The Pixel Defence toolkit does the six things most people actually need — resize, convert, compress, enhance, transform, watermark — for free, with no cloud storage, no account, and no subscription ladder.
Conclusion: One URL. Six Free Image Editing Tools Online. Zero Uploads.
The way most people edit images online right now is the equivalent of going to a different shop for each ingredient when making a meal. It’s fragmented, it’s slow, and every additional stop is another place your data sits without your full knowledge.
The Full Toolkit covers all of the most common privacy tools online needs — in one interface, one tab, with your data never leaving your device.
If you want a deep dive on any individual tool, I’ve written a dedicated guide for each:
[Free Image Resizer Guide] — resize to any dimension or social preset, in seconds
[Free Image Converter Guide] — convert between JPG, PNG, WebP, AVIF and more
[Free Image Compressor Guide] — shrink file size without losing visible quality
[Free AI Image Enhancer Guide] — upscale and sharpen with ESRGAN AI
[Free Image Transform Tool Guide] — crop, rotate, flip, and fix orientation
[Free Watermark Maker Guide] — protect your photos with text or logo watermarks